This tutorial shows how to password protect a folder in your site, using cPanel. This is also known as htaccess or htpasswd folder protection. This allows you to create a restricted area, where your visitors will have to type a login and password to gain access. This guide is based in a cheap web hosting cPanel account from Copahost.
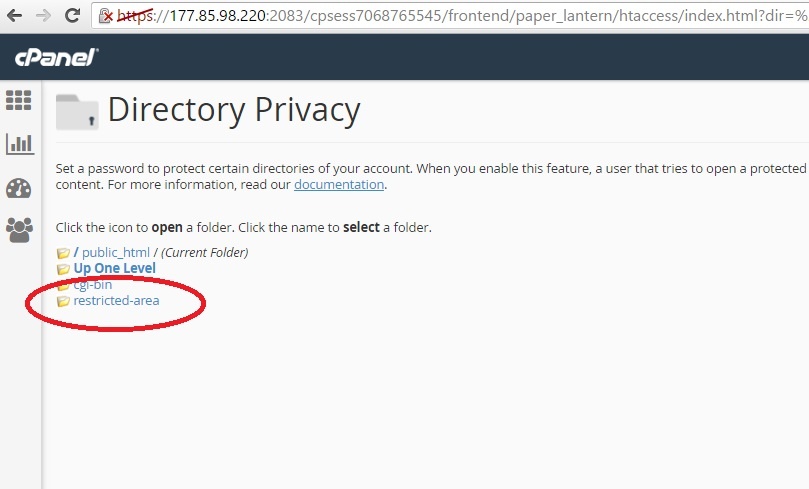
In this example, we created a sample folder called restricted-area inside public_html, and we will protect it with a login and password. We wish to have this URL protected: http://www.siteexemplo.com/restricted-area . This will be our password protect folder.
First of all, we have to open cPanel, and click in Directory Privacy, which is located under the Files tab.
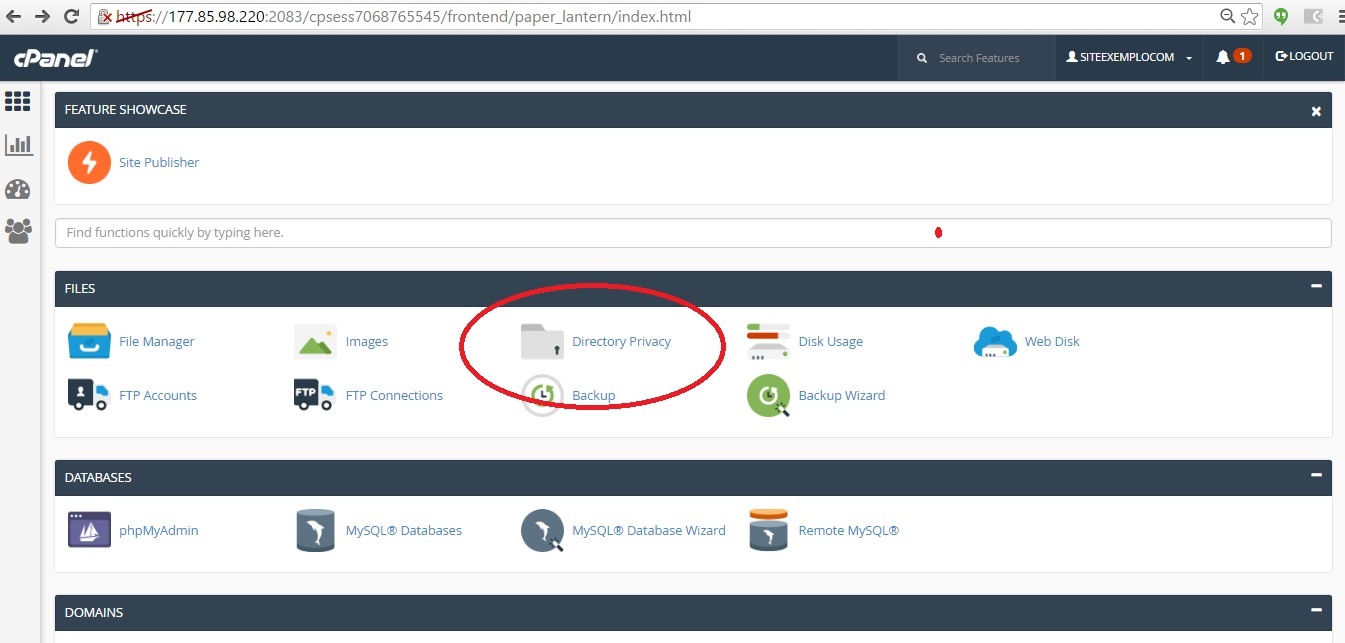
Now we have to find the folder we wish to protect. Our example folder is /public_html/restricted-area . To enter in the public_html folder, we will click exactly in the yellow folder icon, as marked in red. Warning: if you click in the text “public_html”, cPanel will understand you wish to this to be a password protected folder. To avoid this issue, we have to click in the yellow icon as shown.
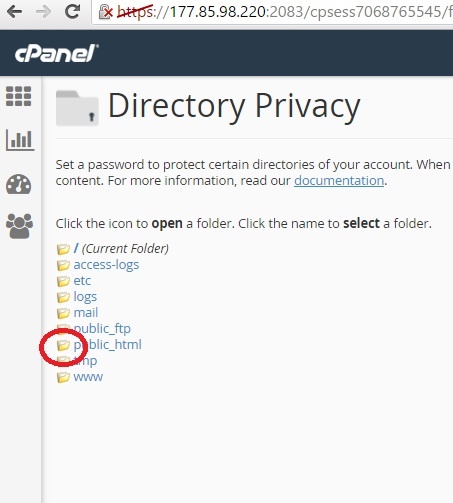
Choosing the place of the password protected folder
Now we are inside the folder /public_html . We must click over the text of the folder we wish to protect (restricted-area).
Now we have to check (activate) the option Password protect this directory, and then, enter a name for the restricted area. You must click Save afterwards.

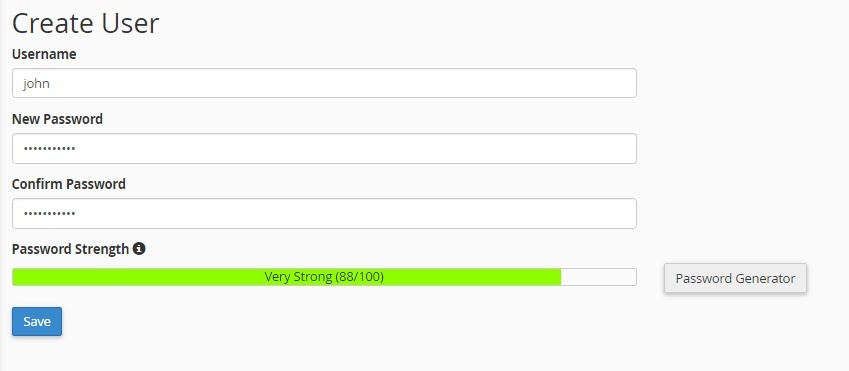
After placing this configuration, we have to choose an username and password. More than one user and passwords can be added. After that, we must click Save.
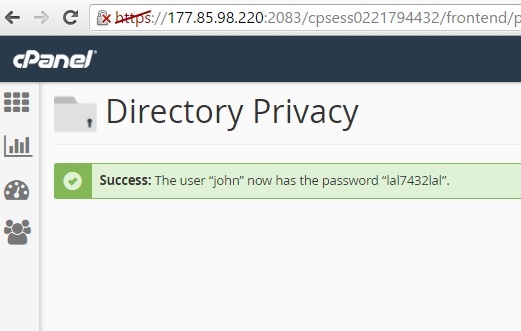
You will see this success message. Now just click Go back
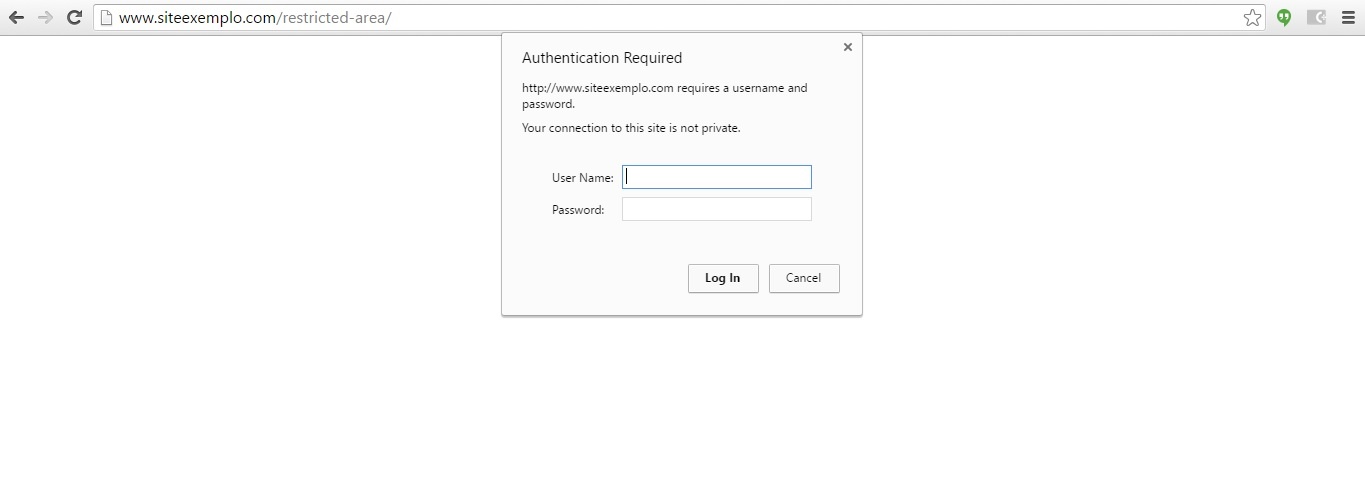
Testing the restricted area, protected by password
The job to password protect a folder is now complete! Now you can open your browser and type http://www.siteexemplo.com/restricted-area
In this example, the htaccess protected folder is restricted-area.
By entering the username created (john) and its password, you will have access to this content.
Add or remove users from htpasswd
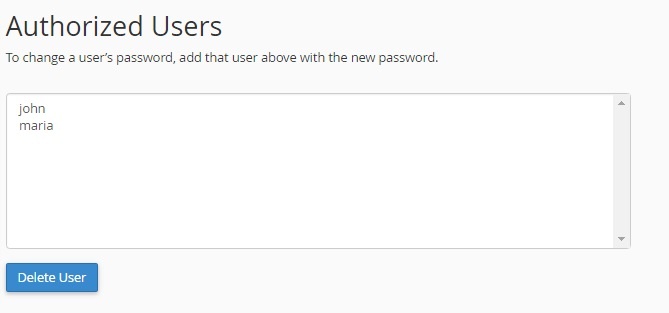
In cPanel you can manage, delete or add more than one user, as shown:
