In this tutorial we will show how to configure Google Analytics in WordPress. It assumes you already have a Google Analytics account, and have already created your domain on it. The Analytics account creation is a very simple process.
Analytics is 100% compatible with WordPress, and can be simply added in your theme footer, as we will show. Insert the Google Analytics in WordPress is a simple process, and should take you less than 5 minutes.
Obtaining the html code to configure Google Analytics in WordPress
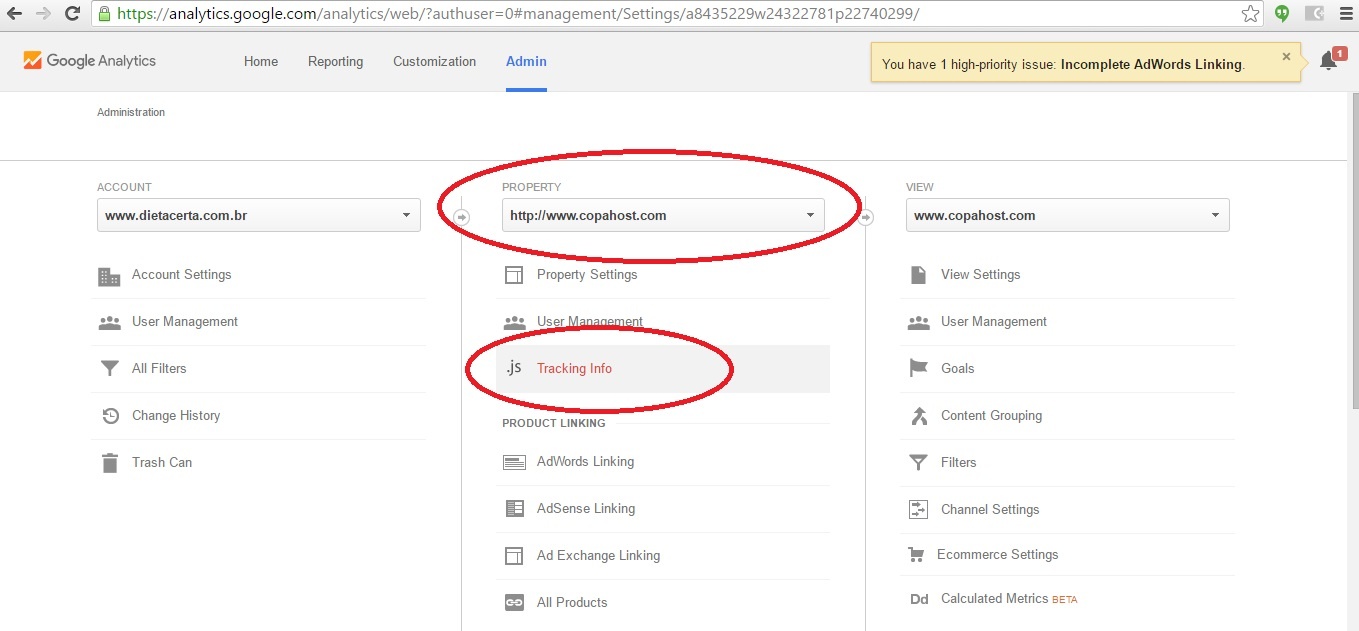
First of all, you have to login into Google Analytics .
Then, click in the option Admin in the top menu.

Now, under the Property tab, find your domain name.
Then, click in Tracking info.
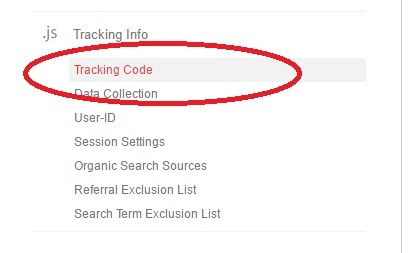
Now, you must click in Tracking Code, right under Tracking Info.
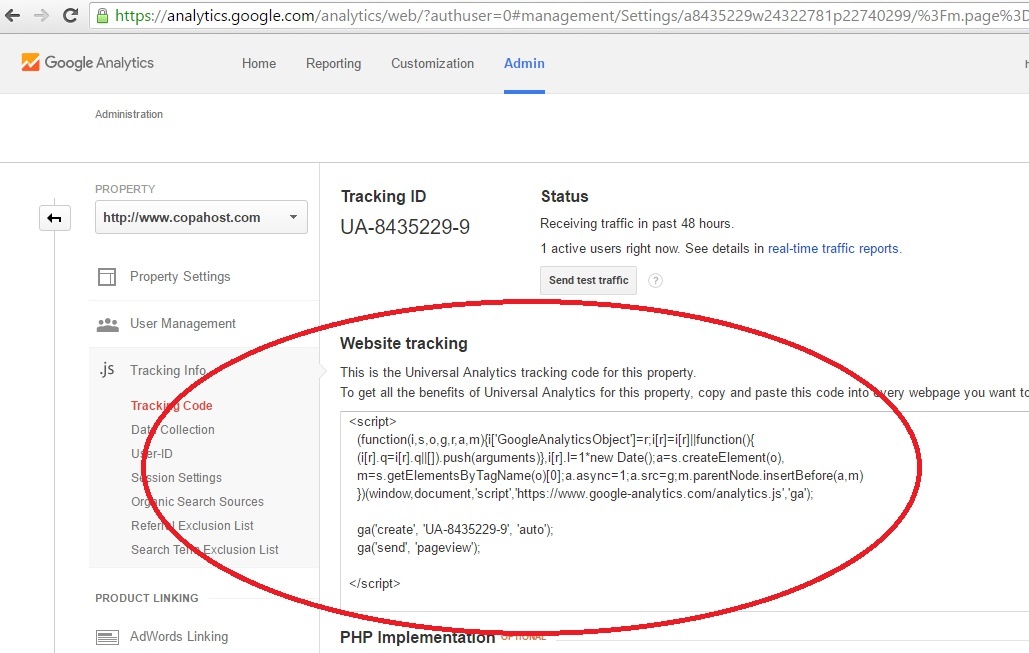
Now you will see the analytics tracking code (javascript). The correct tag begins with <script> and ends in </script>.
You must copy and keep this code. It will be pasted in your WordPress blog soon.
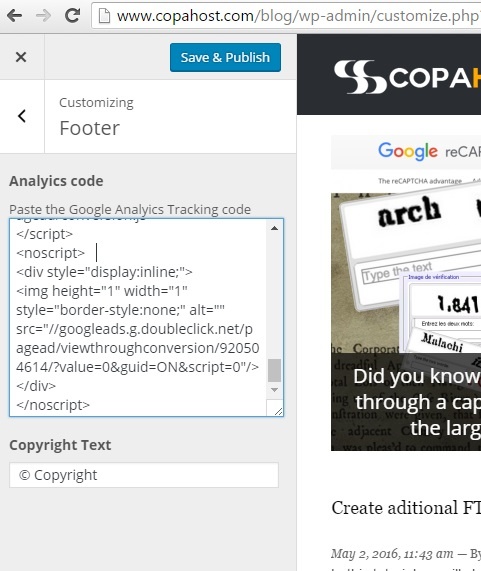
Access your blog to add the google analytics code
Now, access your blog wp-admin at http://yourdomain.com/blog/wp-admin (or wherever it is), and enter your login and password.
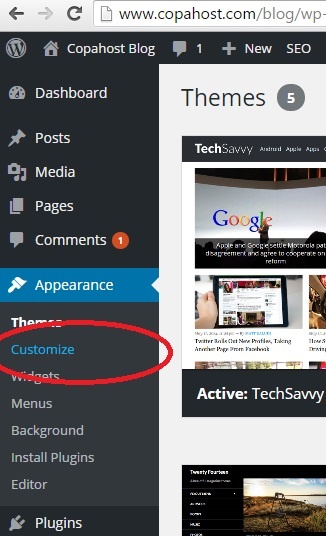
Then, look for the option Customize, in the left menu. This option is located inside the Appearance tab.
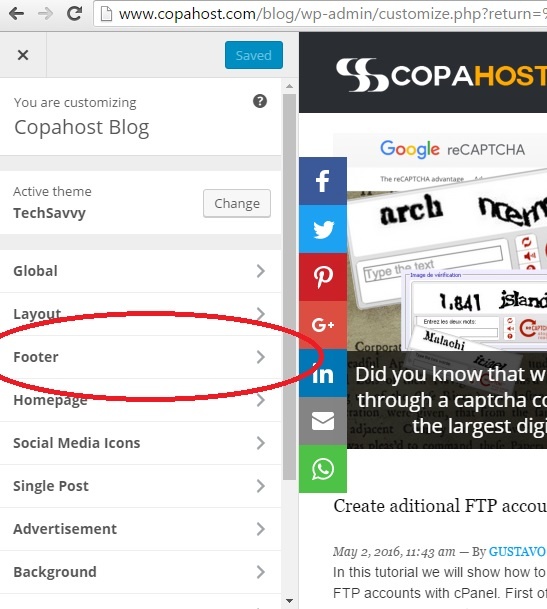
Now look for the option called Footer. In this option, we will edit our blog theme footer.
Please note that the names may vary according to the WordPress theme we have installed.
Now inside the Footer, we should simply copy and paste the Google Analytics code. Then, just click Save & Publish.
