To install MySQL in Ubuntu, need to have root access to an Ubuntu server. This tutorial applies either to a dedicated server and a cheap vps hosting server. The first step is to login by SSH into your server.
First of all, we have to update all the packages of the server
sudo apt-get update
sudo apt-get upgrade
Now we will install MySQL in Ubuntu
sudo apt-get install mysql-server
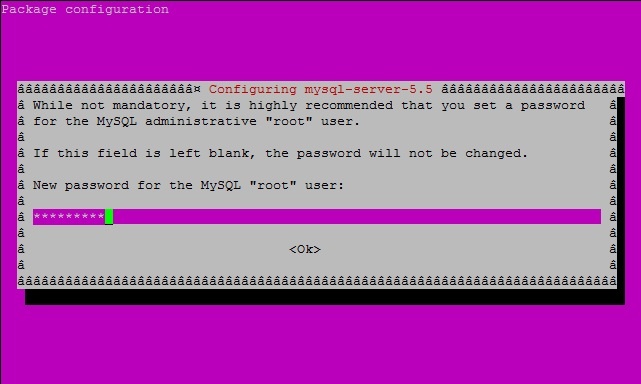
During the MySQL installation uou will be prompted for the MySQL root password. Write it down and keep it in a safe place.

If you forget the MySQL root password, you can read this article: how to recover MySQL root password in Ubuntu
Now that the installation is completed, MySQL will start listening only for internal connections in localhost on port 3306. As you install mysql in ubuntu, the remote connections will be blocked.
Managing the MySQL server
Having the installation completed, we can now login to the MySQL server:
mysql -u root -p
You will see this output:
root@teste2:/# mysql -u root -p
Enter password:
Welcome to the MySQL monitor. Commands end with ; or \g.
Your MySQL connection id is 42
Server version: 5.5.49-0ubuntu0.14.04.1 (Ubuntu)

Copyright (c) 2000, 2016, Oracle and/or its affiliates. All rights reserved.

Oracle is a registered trademark of Oracle Corporation and/or its
affiliates. Other names may be trademarks of their respective
owners.

Type 'help;' or '\h' for help. Type '\c' to clear the current input statement.

mysql>
Managing the installed MySQL server
First, we will create a new database.
create database mydb;
Now we will create a new user. You must replace [password] with the desired password for it.
create user 'user1'@'localhost' identified by '[password]';
Give access privileges to the user to the new database:
grant all on mydb.* to 'user1';
Now exit mysql, and access with the newly created user:
exit
To access with the new user, just issue the command:
mysql -u user1 -p
Creating a MySQL table
To create a new table in our recently created database, we must first issue the command use <database_name> , and then, issue the Create table command:
use mydb;
create table clients (client_id INT NOT NULL, name TEXT NOT NULL ,phone TEXT NOT NULL);
Now the table is created.
Some useful comands, are show tables and describe. Show tables will show you all the created tables in the server, and describe will show in details all the fields of a certain table.
mysql> show tables;
+----------------+
| Tables_in_mydb |
+----------------+
| clients        |
+----------------+
1 row in set (0.00 sec)
mysql> describe clients;
+-----------+---------+------+-----+---------+-------+
| Field     | Type    | Null | Key | Default | Extra |
+-----------+---------+------+-----+---------+-------+
| client_id | int(11) | NO   |     | NULL    |       |
| name      | text    | NO   |     | NULL    |       |
| phone     | text    | NO   |     | NULL    |       |
+-----------+---------+------+-----+---------+-------+
3 rows in set (0.00 sec)
Keep in mind that by completing the install MySQL in ubuntu task, it will block external connections. You can only connect to your database server from inside your server, unless you enable the remote connections.
